We often get asked what can Craft Resin be used on, it is a very difficult answer to give because it can be used on many things and to create many different projects. The list below goes through some of the materials that Craft Resin will stick to and what it won’t.

This list isn’t inclusive of every material it can stick to, we’d be here for days! But it’s a great place to start. If you’re unsure if it will stick to an item that’s not on this list, test it out, experiment with a small piece of the material and see if it does stick to it and what effect it has on the material if any.
Any materials that repel water will mean that the epoxy resin won't stick to it. Epoxy resin won't stick to silicone items, which is a great thing as you can then use silicone for measuring and mixing jugs that can then be easily cleaned. Other items like some metals might just need some surface preparation before applying the epoxy resin.
Clearest epoxy resin can work really well on materials such as wood, photographs, inkjet prints, acrylic paintings, oil paintings that have completely dried, watercolour paintings, spray paint artwork, ink, paper collages, oil pastel artworks, sculptures, projects using flowers, rocks, and other natural objects.
Please be careful if pouring it over lose items as the resin is poured in its liquid form and can move or mix into the resin, it can still move for a while after pouring too while it hardens up fully. You can glue some items down first, or paint over them with a thin clear topcoat to pin them down too.
Sometimes you might need to use a sealant first as the material you'll be pouring the epoxy resin onot could absorb the resin mix and it can seep through.
If you're unsure at all to if the epoxy resin will work on the material you have, a quick google search should give you the answer, or just try experimenting. When experimenting you might want to do this on a smaller, not sentimental projects first.
Oil paintings and oily surfaces:
You can use Craft Resin’s epoxy resin over oil paint, but please make sure it has dried thoroughly, this can take a few weeks for oil paintings to fully dry when left in the right conditions.

Acrylic paint:
You can resin over acrylic paint, as long as the surface you are pouring the resin onto is dry. If you're unsure, simply test out pouring resin onto a small project, or corner of a project to see how it turns out.
Watercolours:
You can use epoxy resin for crafting over watercolours. Paper is a notoriously thin material and epoxy resin can easily be absorbed into many papers. However watercolour paper is normally quite thick and high quality, this enables it to stand up to water which makes it a great material to apply your resin mix to.

Spray paint:
Craft Resin’s epoxy resin can be applied over spray paint, but once again make sure it is fully dried first.
Inkjet prints:
You can use Craft Resin’s epoxy resin over inkjet printed images. Saying that, there are a lot of different papers used with inkjet printing and also a lot of different inks, so they might turn out slightly differently. Matte printer paper may absorb the epoxy resin, whereas glossy paper usually works better as the resin won't seep into it. Once again if you're unsure, test the paper and inks out first.
Photographs:
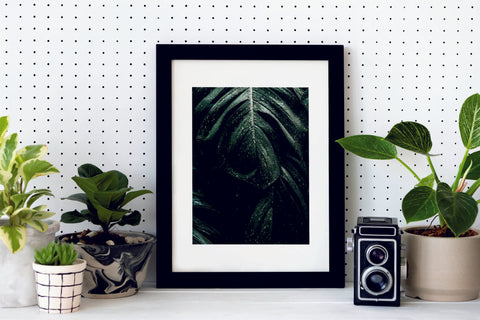
You can use Craft Resin epoxy resin over photographs, again the glossy paper these are printed onto won't soak in the epoxy resin. The benefits to coating, or encapsulating your photographs in epoxy resin can be that they will last longer and you can create a really great frameless modern look with them.
Paper:
Craft Resin’s epoxy resin will cover and seal all kinds of papers, including photo paper, tracing paper, linen paper, origami paper etc. Epoxy resin won't always soak into good quality papers, it's not like other liquids like water.
Some papers that are low to medium quality papers can absorb the resin, this won't necessarily ruin your work, it will simply make colours look darker, to get around this and keep the colours looking the same you can first apply a sealant such as Mod Podge before using Craft Resin’s epoxy resin. Unless you like the look of these darker colours.
Using epoxy resin is a creative endeavour, the fun of being creative is sometimes just giving it a go and experimenting to see how something turns out. If you're unsure to the look you'll achieve, then give it a go and test it out before you get stuck into your final project.

Puzzle:
You can easily use Craft Resin’s epoxy resin over a puzzle. However you will want to secure it to a base before you do this or else the pieces could move around. To do this, you could cut a piece of MDF board to the same dimensions of your puzzle and stick your puzzle to the board with glue.
We would then recommend applying a sealant to your puzzle first before applying the epoxy resin, again the resin may soak into the puzzle and make it look darker, especially around the edge of each puzzle piece, you might like this look, it might work for your project, or it might not.
When you are covering something like a puzzle that has gaps in between each piece, you may need to apply more than one coat of epoxy resin. Air tends to be released between the puzzle pieces which then causes bubbles and when these disperse during the curing process they cause pitting. Applying another layer will even this out and fill in these pitted areas. Just make sure to sand down the first layer of resin you apply once it has cured, so then next layer bonds to the first.
Wood:
Craft Resin's epoxy resin works really well with wooden project. It can be used as a cover to the wood, making the woods natural colours and grain stand out, whilst also protecting the wood for the longer. But it can also be used in very creative ways filling in gaps in the wood, sometimes using incredible colours that pop alongside the natural wooden colours.
Before you apply epoxy resin to wooden projects you must ensure that it is thoroughly dried, it needs to be below 12% moisture content before applying Craft Resin. It's also a good idea to seal your wood before adding the epoxy resin to it, this then avoids off-gassing air bubbles.
To find out more about working with wood and epoxy resin, visit our blog on the subject.

Aluminium:
Craft Resin’s epoxy resin will adhere to aluminium and works well on a number of different metals. You will however need to prep the surface of the metals before you apply the resin to it, this can be done by simply sanding the metals top layer first.
Marker Pen:
You can Craft Resin’s epoxy resin over any water-based or permanent marker once dry. In most cases though you will need to use a sealant over the marker pen artwork first to prevent bleeding and/or discolouration. Once again test to see before you start working on larger more sentimental pieces of your artwork.
Chalk pastels:
Materials like chalk pastels can be a tricky one to master when mixing it with resin. Chalk pastels are made up of small particles of the material and so can easily move around your work.
If you'd like to create a free flowing piece of art with chalk pastels then you can always just pour it on and see what the natural movement of the resin takes the chalk pastel colours. But if you'd like more control over how the colours mix then you'll need to try not to disturb the chalk pastels as much as possible during the spreading phase. Try tilting the canvas board to more the resin evenly over rather than spreading it with the spatula or other tools.

Sculptures:
Sculptures can be covered in Craft Resin, however they can once again be tricky as they're sometimes not placed in a mold and the shapes of them can be very uneven. With sculptures it's not simply a case of pouring onto it and leaving it to settle.
You'll need to apply the epoxy resin to the sculpture in thin coatings using something like a foam brush or your hands. If you apply too much it will drip down and potentially come off your sculpture.
When creating a project like this, make sure you have anything your creating the work covered with plastic sheeting and the area around it too as the epoxy resin can get everywhere and be difficult to remove if say it lands on your carpet.
Jewellery:
Craft Resin’s epoxy resin can be used to create different jewellery pieces, for example, pendants, rings, earrings and bangles are all very popular jewellery makes that you can use Craft Resin to create. You can use molds to create these or pour the resin into bezels that will hold the resin in place and add a lovely edging to your jewellery pieces.

Organic material and natural objects:
Craft Resin can be used over many natural objects, including, but not limited to - Insects (possibly butterflies etc, we would urge you to only use this one ones that are no longer with us, not harming any living creature in pursuit of your art), flowers, petals, rocks, stones, leaves, bark etc.
The resin can seal natural objects offering them protection so they don't degrade over time, and they can also bring out the colours in the objects too shining their brilliance.
Please note though, that resin can make some items look as they would when wet, as in a darker colouring to them - test first so you know exactly what to expect.
Make sure natural items are thoroughly dried or they may rot in the resin, turning them a brown horrible colour over time.
Some natural objects can also give off gas, trapping air into the resin in the form of bubbles - you may want to seal your natural objects first before you fully resin over them.
If the natural objects you are covering aren't flat it might take multiple coats of resin to cover them fully. Some of your work might be very delicate, so please be careful if so, resin can be heavier than the object you're covering, especially when used in large amounts, consider covering your natural object in thin layers and building it up gradually.

Gold leaf:
Craft Resin’s epoxy resin can be used over gold leaf. Again this can be quite delicate to use in your project and can move around in the resin if it's loose.

Textured artwork:
As with natural objects that need covering that aren't flat, you may need to apply multiple coats over textured artworks. If you want to leave the texture to it sticking up, then simply paint on the resin again to give it a protective glossy coat. However if you would like it completely flat and the artwork encapsulated in it then you'll need to build it up in layers as you would with any thick project.
We do have a blog which explains the techniques to use to create thicker projects here.

Fabric:
Craft Resin won't fully soak into the fabric, but it will still give it a wet look to it and will make the fabric stiff once it has fully cured. To see how this wet look may affect the colouring and your project, we would advise testing it out on the fabric of your choice first.
Polymer clay:
Craft Resin’s epoxy resin can be used over polymer clay. This can help to seal the sculpture in, help make the structure stronger and also give it a glossy look.
Once again cover polymer clay sculptures with epoxy resin with a paintbrush, getting into all the nooks and crannies to the artwork, building it up in layer. Unless your sculpture is small then these can be dipped into a mixing jug of Craft Resin.
Coasters/Hot Plates:
Craft Resin’s epoxy resin works well to create items like coasters and placemats. After 21 days of curing Craft Resin builds up it's heat resistance and generally the heat from a hot mug or plate will not damage the surface.
As with most things there is a limit to the temperatures Craft Resin can withstand, if you remove a mug straight from the microwave with a hot liquid in it, then this could be too much heat if placed on the coaster straight away for example. The recommended maximum temperature the cured epoxy resin can stand without causing damage is about 200F or 93C.
Read our blog on creating coasters.

Ceramics:
Some artists like to create their work on ceramic tiles for example, Craft Resin’s epoxy resin will bond to ceramic material. To cover ceramic tiles with epoxy resin simply pour it over the project and spread it as you normally would. If you are covering a bowl or a sculpture that's not flat you may want to paint the resin on with a paintbrush and build it up in layers.
If you're covering ceramic plates with Craft Resin, please make sure it has fully cured before serving food on it. Craft Resin is safe for use as a food contact surface.
Food to preserve it as a decoration (please don't eat it once resined!):
If you cover food thoroughly and encase it in epoxy resin, it will stand the test of time and stop it from rotting.
One of our artists created resin pizzas for a Chicago Pizza campaign one which were then hung onto a Christmas tree for use in articles on how the takeaway market was exploding over Christmas. The pizzas looked great and they will last a very long time and can be used again and again - but still never to be eaten (possibly a waste of pizza if you ask us lol).
Countertops/Worktops:
Craft Resin’s epoxy resin can be used to coat kitchen countertops/worktops, although the resin when fully cured will be scratch resistant, please note it will never be fully scratch proof, especially when being used where sharp knives could be used on it.
If you'd like to give it extra protection over the top of the resin surface you could consider adding a polyurethane top coat. Craft Resin’s epoxy resin is approved as food safe as a food contact surface.
Please also do a lot of research before trying a project like this, it's a very large project and it can go wrong, so please read up on how to do this and make sure your environment is set up to be able to create a project of this scale.
Read our blog on creating countertops/worktops.
Flooring:
The same guidance stands as the guidance for using Craft Resin for countertops. It is scratch resistant not scratch proof, it will need a topcoat of polyurethane to make it more durable and protect it for hardened use.
Please also be aware that when epoxy resin gets wet when cured, it can be extremely slippery. Limit water getting on it if you can, wipe it dry straight away on flooring if it does get wet. And only use it for indoor flooring options.

Pen blanks:
You can certainly use Craft Resin’s epoxy resin for use on pen blanks. Although this type of project may be more fiddly than larger projects, the end results can look amazing.
Coating fishing lures:
Craft Resin can be used to create fishing lures, it is very durable and is waterproof so is great for use on something that could possibly get wet. When the resin is fully cured no particles from it leach into anything and so is perfectly safe for river/sea life.
Guitar body:
You can use Craft Resin's epoxy resin over a guitar body. Make sure you work in multiple thin layers to avoid mass dripping. The best technique is to hang the guitar from a wire so that any drips that do gather, do so at the bottom where you can then easily sand them down and where you will drill in the strap peg.

What materials will Craft Resin NOT stick to?
Craft Resin’s epoxy resin can be used on lots of materials as demonstrated above, however it doesn't stick well to a few items, for example, again not an exclusive list:
Disposable plastic paint sheeting
Plastic sandwich/shopping bags
Silicone molds, or anything silicone for that matter
The non-sticky side of shiny tape
This can be a great thing as Artists can use these materials to help mix, pour and clean up their resin without the need for single use items. For example you can easily use silicone mixing jugs to mix your resin, then simply leave any resin mix to cure in these jugs then fold them out and wipe off any excess resin ready to use them over again.
If you have experimented and have tried Craft Resin on other objects/materials and it's worked well, or not so well on them, please share your experiences in the comments below. There might be a really obscure and wonderful material we haven't thought of yet that may inspire others to use.
Team Craft Resin

